Though our kitchens fill up with all kinds of gadgets to make cooking easier, sometimes all it takes to make an easy but delicious meal is a simple sheet pan. Sheet pan meals are a variation on the one-pot meal idea and we are totally behind this new way of using an old friend in the kitchen.
But, it’s not quite as simple as dumping a bunch of ingredients on a pan.
You might end up with some parts soggy, some parts overdone, and other parts underdone. The details matter.
Here we share a few tips when making sheet pan meals. If you’d like a few more ideas about what to cook on your sheet pan, click here for seven sheet pan dinners that make life easier .
#1 Choose the right sheet
Technically, sheet pan meals are made on ‘half-sheets’ and some sites make it sound like you need to go out and buy yourself a special commercial quality sheet. Not so.
The pan does need to be sturdy – a flimsy baking sheet will end up warping, which can mean pools of wet ingredients in the liquids mixed with dry patches. It also needs to have sides, at least an inch, so the liquids don’t leak and the contents don’t slide off when pulling it out of the oven.
The pan should be about cookie sheet size so the contents can be spread out – for ingredients that cook faster and taste crispier. Whether aluminum, stainless steel, stoneware, exactly half-sheet pan size or not, doesn’t matter.
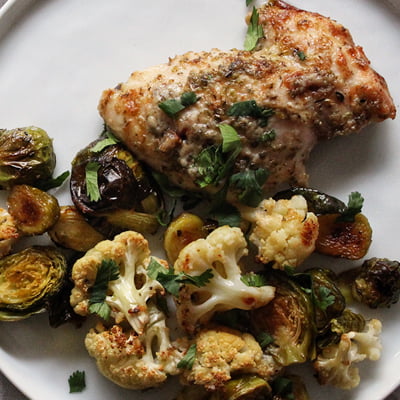
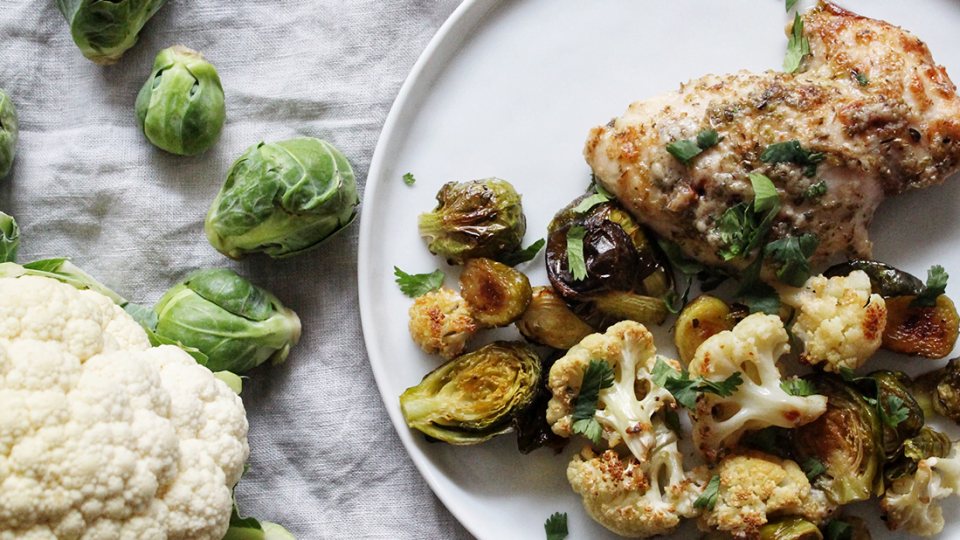
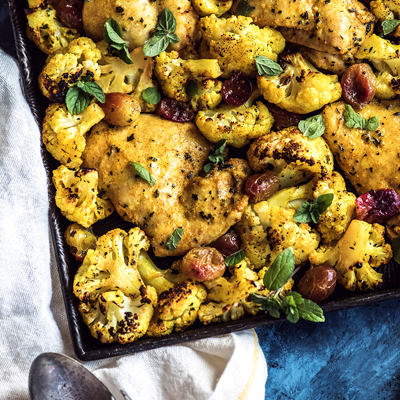
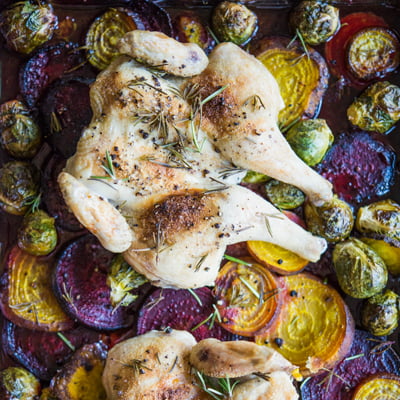
Got the right sheet pan? Try it out with sheet pan spiced roast chicken, cauliflower and grapes.
#2 Take into account cooking times
Different ingredients take different times to cook – carrots, for example, take a lot longer to bake than salmon.
When putting together a sheet pan meal, keep the variety of cook times in mind. Otherwise, you’ll end up with hard carrots and dry salmon. That might mean that you only use ingredients with similar times, or that some ingredients will be added after for a shorter baking time.
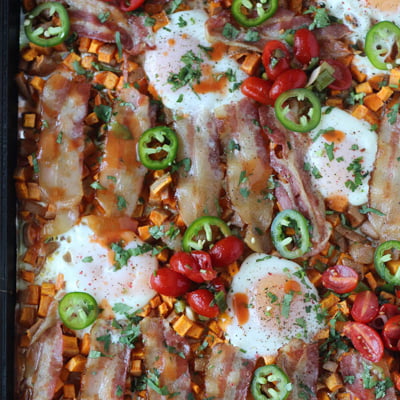
Try adding ingredients at different times with a sheet pan breakfast bake.
#3 To line or not to line the pan
Some recipes will tell you to line the pan with foil or parchment paper, others say don’t. Is there a difference? Does the recipe have to be carried out exactly as stated?
There is a slight difference between lining the sheet pan or not. When lined with foil, parchment paper or a silicone mat, the heat is distributed more evenly, which helps the contents to bake more uniformly. However, a lining also acts as a barrier between the heat of the pan and the ingredients, so the individual pieces are soft rather than crisp.
Foil and parchment paper mean fast clean-up but more garbage; no lining means more clean-up but less garbage. Parchment paper shouldn’t be used if you are going to broil, however, as the paper can catch on fire. Aluminum foil is dodgy health-wise.
In the end, no matter how the recipe is written, whether you line the pan is up to you and what is best for you in your kitchen.
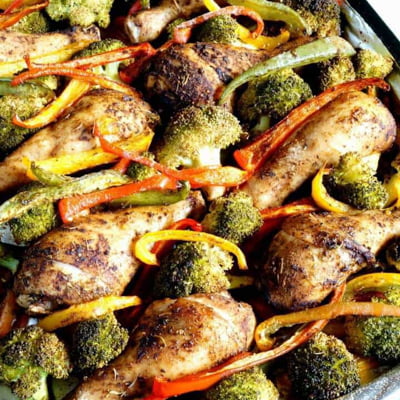
Choose whether to line the pan or not with super easy sheet pan chicken with vegetables.
#4 Preheat the pan
If you are using parchment paper or a silicone mat, skip this step because it won’t make a difference.
But if you are using foil or a bare pan, tossing the empty pan in the hot oven first will help crisp up the ingredients, from chicken skins and bacon to potato edges and peppers.
#5 Dry the meat and veggies
Blotting the excess liquid from ingredients means that there is less water on them when roasting, which means you get a crisper edge. However, blotting water takes time, which may be time you don’t have.
So, if you are in a hurry, feel free to disregard this step.
However, if you want to impress with a spectacular crispy-edged meal, then blot away!
#6 Don’t crowd the pan
Another tip to avoid soggy meal syndrome is to not crowd the ingredients on the pan.
If there isn’t enough room between the ingredients, then the water won’t be able to evaporate. Instead, it will stay on the pan and make everything wet and limp. This is not what you want. So spread out the ingredients, and don’t use too many.
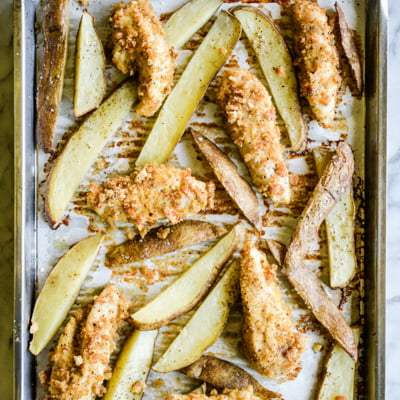
Look at all the room with these sheet pan chicken fingers and fries.
#7 Layer, mix, or separate
How you place the ingredients on the pan makes a difference.
Sometimes everything is all mixed together, so the flavors meld. Other times veggies are mixed and then meat or eggs gets nestled inside. Or each ingredient can have it’s own place, due to separate sauces or cooking times. You can even place ingredients on top of each other so that the bottom one doesn’t dry out.
Another approach is to use a cooling rack to place ingredients that shouldn’t get wet. For example, steaks or breaded anything, over top of the rest.
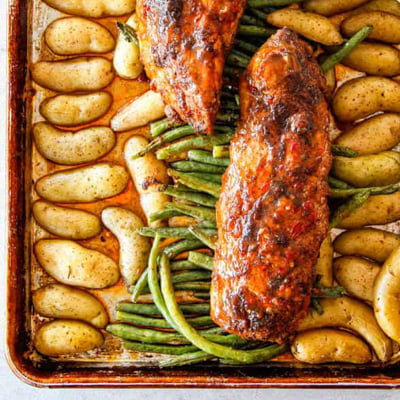
Try layering with sheet pan chili Dijon pork tenderloin with potatoes and green beans.
#8 Use a meat thermometer
It can be hard to tell if your meat is done without fishing it out of the rest of the meal, hacking it apart, and then putting it back in.
You don’t want to undercook those thin slices of meat, but neither do you want to dry them out. Stick in a meat thermometer and know instantly.
Try using a meat thermometer with Spatchcock hen sheet pan dinner.
#9 Broil to desired crispness
If dinner isn’t quite as crisp as you would like, turn on the broiler and let that close high heat give the food a crispy finish.
However, do not walk away from it!
Watch it like a hawk because crisp can become burnt in the time it takes you to check Facebook (and probably less). Also, avoid using a broiler if you’ve used parchment paper because any dry paper sticking up can catch on fire.
Try broiling to desired crispness with this Sheet Pan Greek Chicken and Veggies recipe.